WinSCP/PuTTY Setup (Windows)
Prerequisite
- Have an active account and project.
- Be using the Windows operating system.
WinSCP is an SCP client for windows implementing the SSH protocol from PuTTY.
-
Upon startup:
-
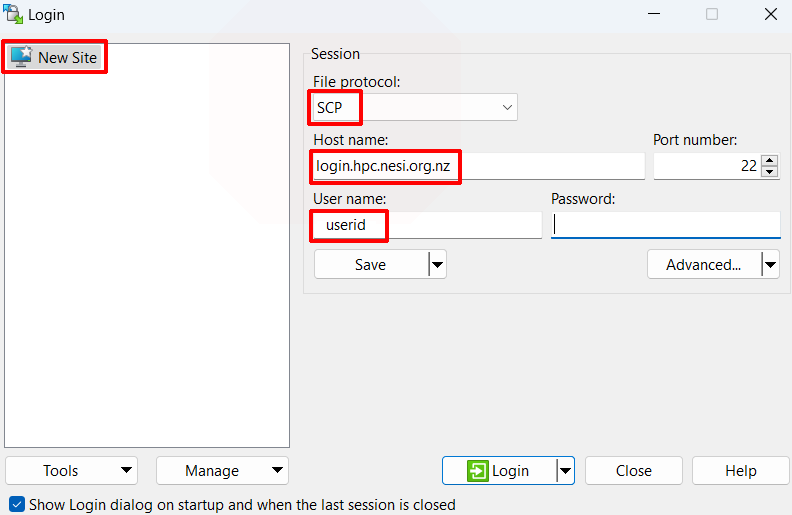
Add a New Site and set:
- Enter Host Name:
login.hpc.nesi.org.nz. - Enter your Mahuika username into the User name: field
- Enter Host Name:
Tip
For "file protocol" (the topmost drop-down menu), either SCP or SFTP is acceptable. If you are trying to move many small files or have a slow or flaky Internet connection, you may find that SFTP performs better than SCP. Feel free to try both and see which works best for you.
-
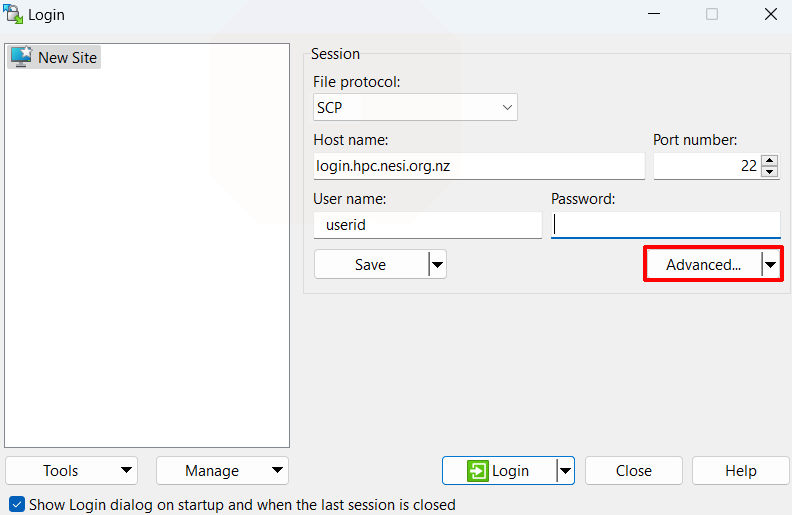
Open Advanced Settings.
-
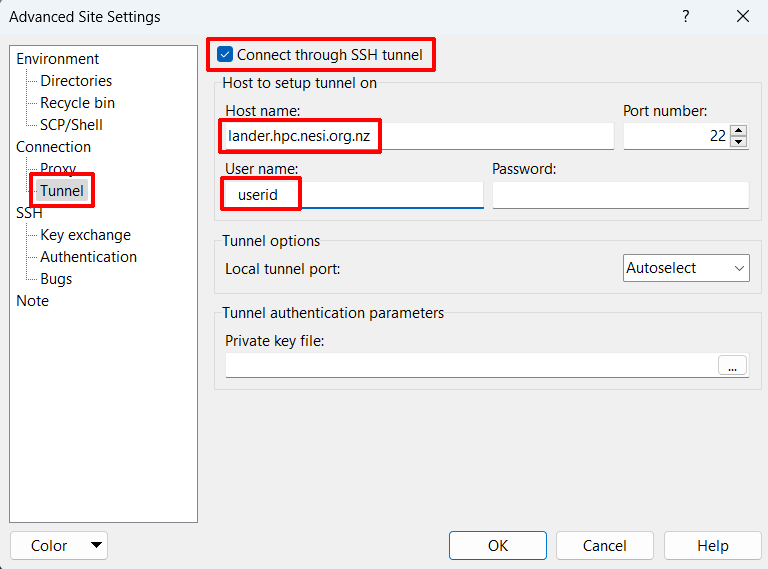
Navigate to Connection & Tunnel and set:
- Enable "Connect through SSH tunnel".
- Under "Host name:" enter lander.hpc.nesi.org.nz
- Under "User name:" enter your username.
- OK > Save
Note
When logging in to the cluster using WinSCP the authentication link is clickable. You do not need to enter anything in the text box under the authentication link.
Setup for PuTTY Terminal
The default WinSCP terminal is basic. We recommend you use the PuTTY terminal instead.
-
Download PuTTY and install.
-
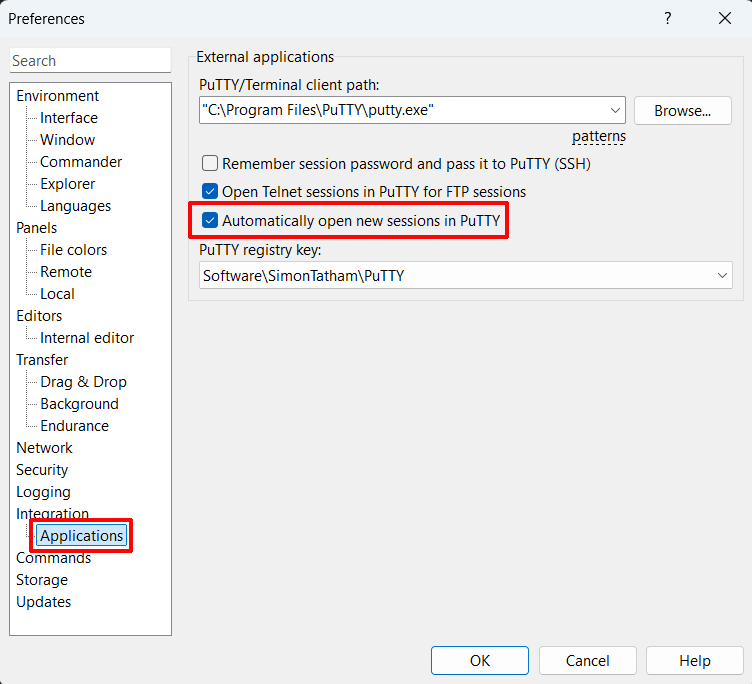
In WinSCP open 'Options > Preferences'
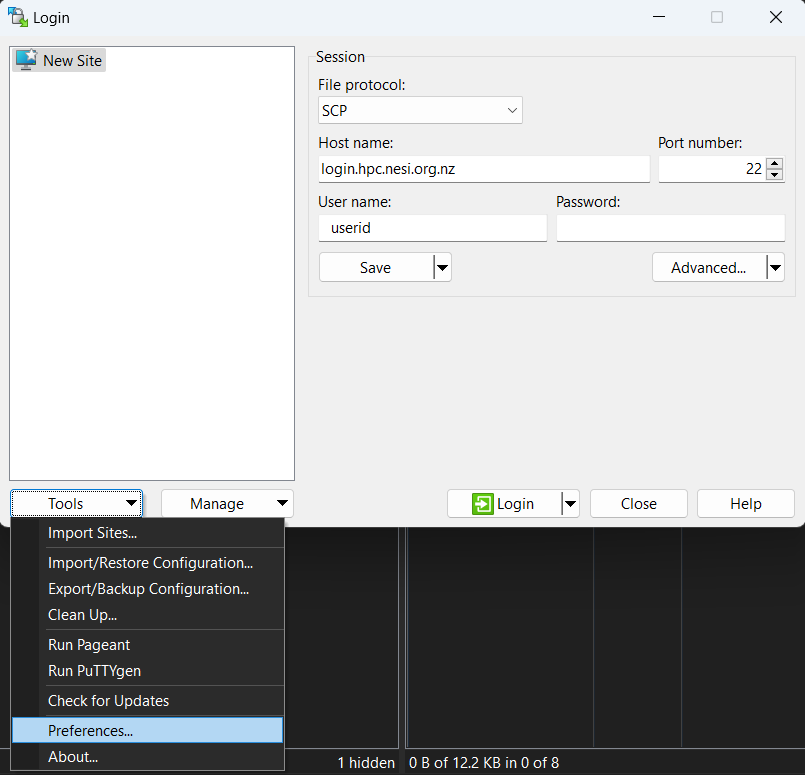
- Under Integration > Applications enable Remember session password and pass it to PuTTY
Setup for Xming (Optional)
Xming is an X server for Windows allowing graphical interface with the HPC. Xming can be downloaded from SourceForge.
1. Install Xming following the prompts. (Make sure 'Normal PuTTY Link SSH Client' is selected).
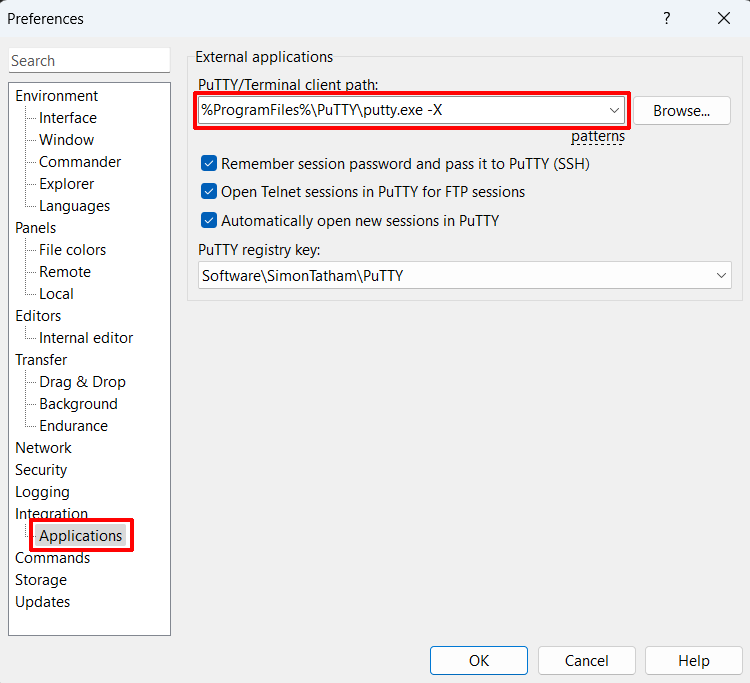
2. Under Integration > Applications and add -X after PuTTY/Terminal client path.
3. Restart your session.
Prerequisite
In order for X11 forwarding to work you must have an Xming server running before connecting to Mahuika.
Usage
Files can be dragged, dropped and modified in the WinSCP GUI just like in any windows filesystem.

 Will
open a PuTTY terminal. Assuming you followed the steps setting up
PuTTY, this should automatically enter your details.
 Will
open the default WinSCP terminal. While the functionality is
identical to any other terminal the interface is slightly abstracted,
with a separate window for input and command history drop-down.
 Type
here to change directory. The GUI doesn't follow your current
terminal directory like MobaXterm so must be changed
manually. (Recommend making this larger as the default is hard to
type in).
 Bookmark
current directory.
Troubleshooting
Repeated Authentication Prompts
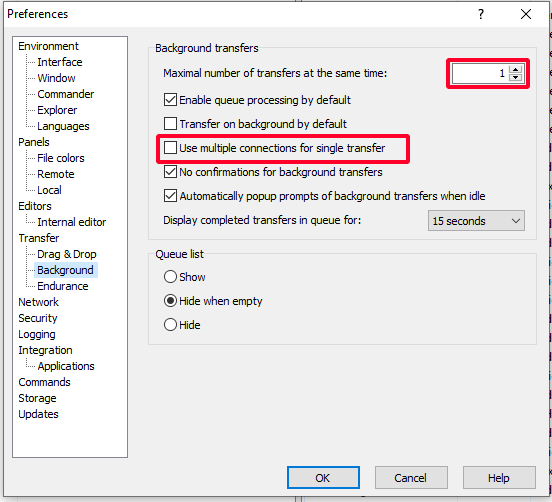
By default, WinSCP will create multiple tunnels for file transfers. Occasionally this can lead to an excessive number of prompts. Limiting number of tunnels will reduce the number of times you are prompted.
-
Open settings

-
Under 'Transfer' -> 'Background', set the 'Maximal number of transfers at the same time' to '1' and un-tick 'Use multiple connections for a single transfer'.
Warning
Transfer Mode: There are known issues using the default Automatic transfer mode. Some files, including source code files (aka text files), can be transferred with erroneous line endings. This will cause scripts or jobs to fail. If you see extra ^M characters in your files (easily seen with the cat -v command), this means your files have been transferred incorrectly. A workaround that may work is to switch the WinSCP transfer mode to Binary
We recommend using a different file transfer client.
What Next?